I’m planning on cutting some gear wheels and, having struggled with using a hole-saw to cut blanks, decided a trepanning tool was probably the answer.
The tool is only meant for cutting 1/8″ thick stock. Tested on brass and aluminium (may not be up to the job with steel). Use low speeds and if you don’t know what you are doing, don’t do it!
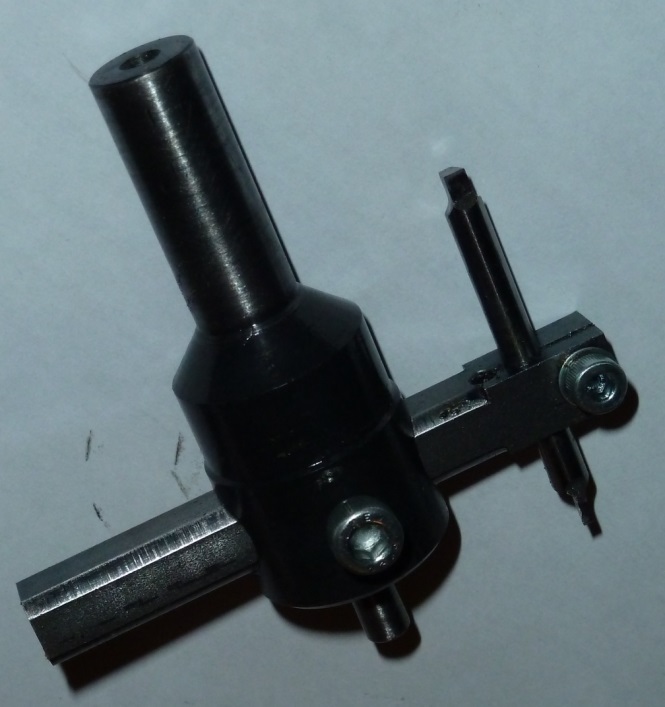
The Finished Trepanning Tool
The dark colour of the main body is due to a (failed) attempt to case harden the pilot; it is just uncleaned scale from from heating. I actually found the setup to be sufficiently rigid that the pilot didn’t take any load with 1/8″ brass and the narrow cutting tool shown below in the bottom right of the picture.
The Plans
These are not proper dimensioned drawings in an engineering sense, and were produced as part of the design process, but they should be sufficient. Stock used was steel 1″ dia bar and 3/8″ square.
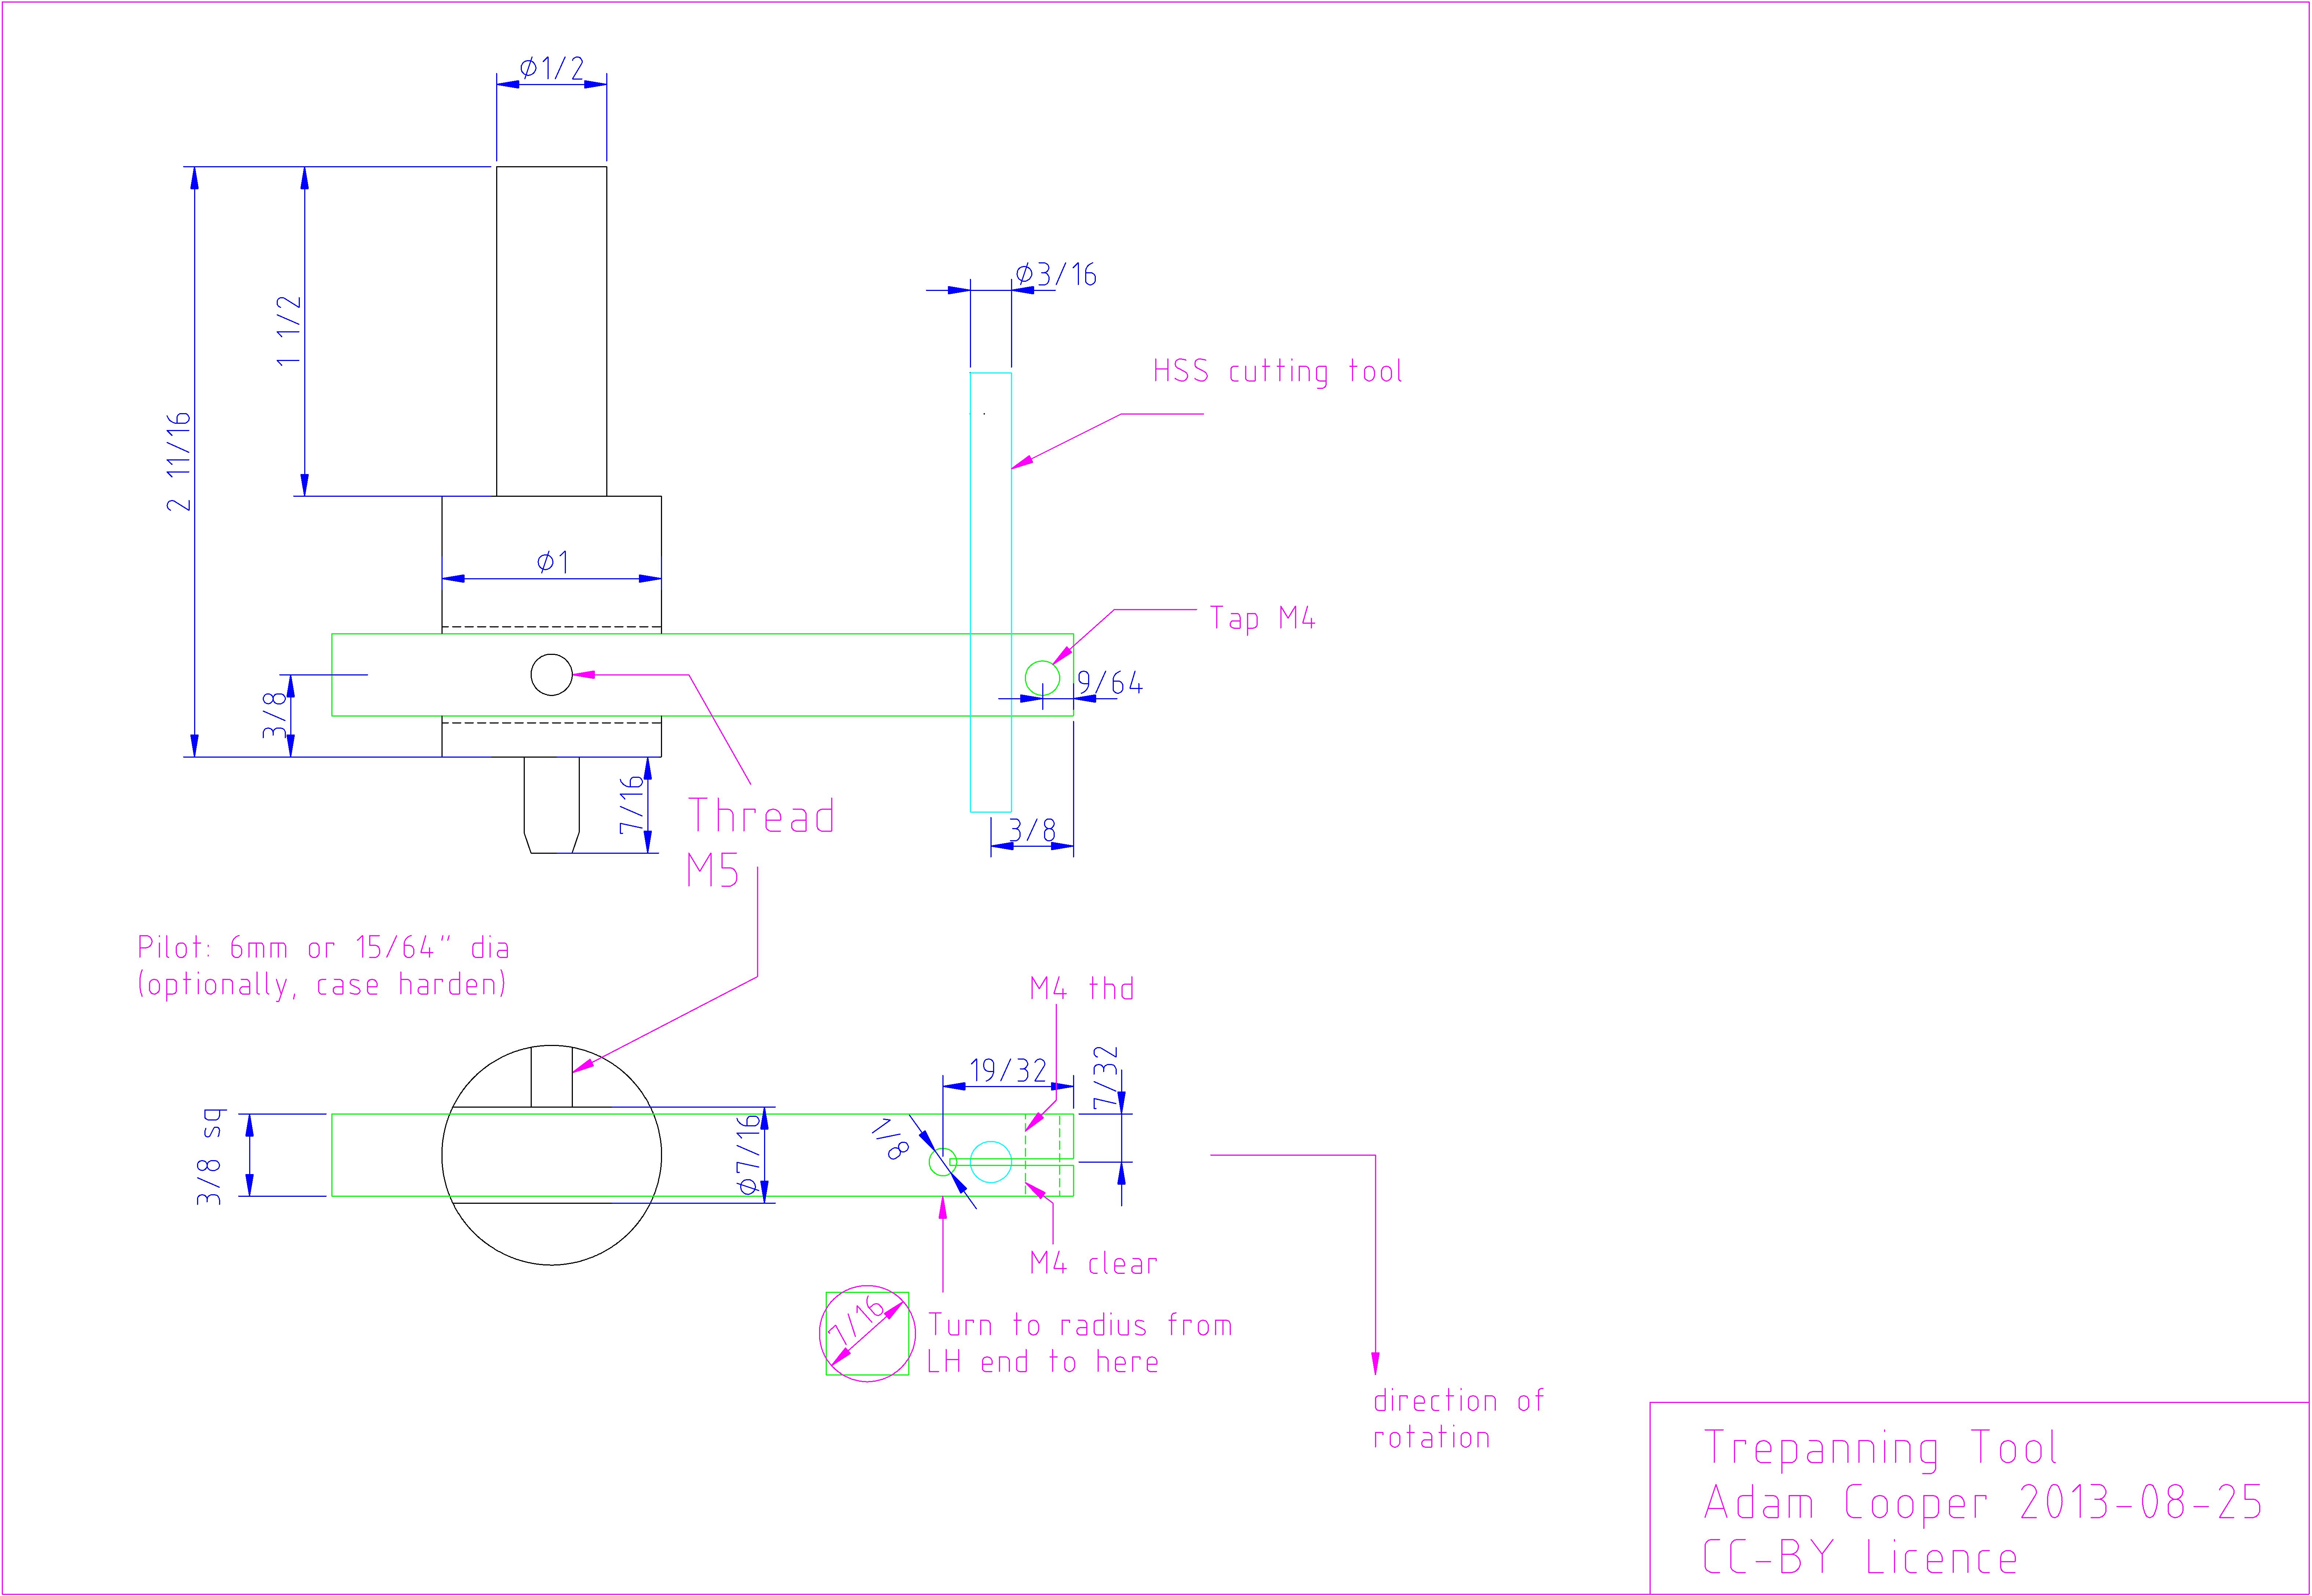
Also available as a DXF File.
Brief Construction Notes
Arbor
Cut 1″ dia stock to slightly over length
3 jaw chuck :-
- face off (light cuts), centre drill and support with tailstock centre
- turn down 1/2″ shank
- brighten up about 1/4″ of 1″ dia body (used later for concentricity setting with DTI)
- cross-drill, widening progressively to 7/16″ (ideally finish to size with reamer)
- drill and tap M5 (and shorten M5 cap screw to match)
4-jaw chuck :-
- hold using 1/2″ shank, adjust to near zero runout with DTI
- turn pilot (should be concentric with shank)
Cutter Arm
3/8″ square stock
4-jaw chuck :-
- face off both ends (low overhang from chuck)
- centre-drill second end, loosen 2 adjacent jaws, withdraw from chuck and support on centre, retightening the jaws to same setting
- turn to 7/16″ dia to fit arbor
Pillar drill :-
- drill and ream 3/16″ for cutting tool
- drill 1/8″ for end of slot
- drill for clamp bolt (M4 tapping drill size)
- cut 1/32″ slot
- drill clear for clamp bolt (up to slot)
- thread M4 for clamp bolt
The Cutting Tool
Grind a 3/32″ or 1/16″ wide cutting point. Give it plenty of side clearance because the tool will be making an arc. Tighter arcs => more side clearance will be needed at the expense of a weaker tool.
Since round tool steel is used, the cutter can be rotated to adjust the in-use clearance a little to compensate for slightly uneven grinding, and changes in cutting radius, but I suppose the cutting face should be fairly close to lying on a radial line.

